
Google Mail: Distribution Groups

Tech Tip: Distribution Groups in Gmail

Begin in your chrome browser while visiting your PortagePS Gmail.

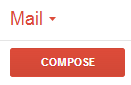
At the upper-left corner of your gmail, you will see the compose button and above that the "Mail" title.


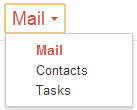
Click on "Mail" and you will see this drop down menu, select "Contacts".


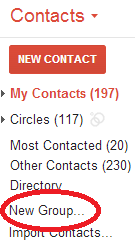
Now under contacts you will see "New Group". Click there...


Enter a name for your new group in the dialog box that pops up. Click OK


Now that the group has been created, there are a couple of different ways to add contacts to your new list.

Method 1: Go to your new list and add contacts directly from there.
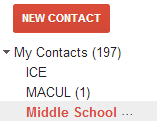


At the top of your contacts, click on the person with the "+" sign. Click in the text box. Begin typing a name and choose from the selections available. Then click "Add".


Note: You can type and select multiple contacts prior to clicking "Add".


Method 2: Go to the individual contact who wish to add to a list.


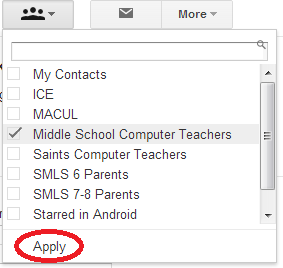
Click on the "body" button with three heads. 


Select the group you wish that person to belong to and click "Apply". This contact has now been added to your list.


To Send and Email to this Group...


Method 1: Compose an email and in the "Recipients" (or To:) field type the name of your group. It should appear as a selection.


Method 2: Navigate to your contacts, locate your group, and select the members of that group you wish to email.

Note: To select all members of the group at once, click on the "Select All" box at the top of the list.


Compose your email and then hit send. Done!

Great work! Now you can create any number of distribution groups you need in order to make your use of gmail that much more efficient.

Popular posts from this blog

Google Docs: Fonts for Early Elementary

Sample of search results from fonts.google.com A couple weeks ago, I was sitting in a training with a bunch of my favorite lower elementary teacher friends, and several of them were lamenting the fact that it is hard to find "good" Google fonts for the little people they work with on a daily basis.  Specifically, it is a challenge to find the single story lower case a and the open 4 .  This conversation, of course, sent me out on a mission to remedy this for these fantastic people.  So, the next day I put on my headphones, turned up the tunes on Spotify, and dived into the website fonts.google.com .  This website lists all the Google fonts available.  It also allows you to type in your own letters and numbers and see them in all the various fonts.  For my purpose, I typed in "abckgy 1234 This is the font."  From here I could see all 877 fonts, and look specifically for the a   and the 4.  It was quite an adventure, and I came across...

It's time to change your password!

There are several times a year when it is important to change your password.  Your password will expire every 90 days. When your windows computer informs you that your password will be expiring soon, CHANGE IT THEN! It is also always a good idea to change your password before going on break so that you do not get locked out of your computer, email or gradebook.  Here is how you change your password from the school windows computers. On your Windows desktop/TEC computer , press the Alt, Ctrl and Delete buttons at the same time. Click on "Change a Password" on the menu below: Enter your username, if needed, and follow the directions on screen. If you are off site or working solely on a Chromebook , you can use the VDI (Virtual Desktop) to change your password.   Simply go to vdi.portageps.org.  Click "VMware Horizon HTML Access."  Click "Accept."  Login with your portage username (leave off the @portageps.org) and password.  Click "Login." ...

Skyward Tech Tip: Modifying Attendance

There are times when a teacher must modify attendance. This tip explains how. Note: Modification of attendance history by teachers is limited to a two week window. Should it be necessary to modify a student’s attendance beyond that window, please contact your building office. Step 1: Navigate to the Take Daily Attendance - By Name From the home screen (Dashboard), Click Teacher Access and choose Post Daily Attendance Choose any class “By Name” Step 2: Scroll to the right to see attendance history Step 3: Choose student/day for which you wish to modify attendance Note: Student Attendance may only be modified by individual student Note: Should you need to modify attendance from the day before, the column appears wider than the others. Locate the student for which you will modify attendance and click in the furthest left region of that cell. You will know you are in the correct location when you cursor changes from the arrow to the pointer hand. Step 4: Ch...