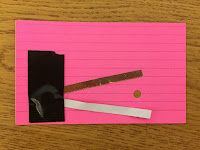
Materials Needed
● 3 x 5 index cards
● Hole punch
● Marker(s)
● String or Ribbon
● LED Diode
● Watch Cell Battery
● Copper Tape
● Duct Tape
Directions
Step 1: Write your name on your 3 x 5 index card. Decorate as desired.
Step 2: Use a hole punch to punch a hole where you want your LED light to poke through.
Step 3: Flip card over
Step 4: Gently bend apart the “legs” of the LED diode so that it looks like it is “doing the splits.”
Step 5: Cut 2 strips of copper tape, approximately 2-3 inches in length
Step 6: Carefully remove the paper backing on one of the strips of copper tape. Adhere the tape to the card so that the copper side is up. One side of the tape should be directly above the hole. The other end should be directly across from the hole.
Step 7: Place the battery on the end of the tape away from the hole.
Step 8: Leaving the paper backing on the second piece of copper tape, place the tape face down so that one end is below the hole and the other end is on top of the battery.
Step 9: Use duct tape to secure the tape and battery. Make sure your two copper tapes do not touch. This will short your circuit.
Step 10: Place the LED diode through the hole so that one of the “legs” is touching the copper side of each of the pieces of tape. One leg should be on top, the other should be under.
Troubleshooting: If the light does not turn on, turn the LED diode around. The LED is directional so will only light one way.
Step 11: Once the LED is lighting up, place a piece of duct tape over the LED and tape to hold it in place.
Step 12: Attach a lanyard, string, or ribbon to your 3x5 card.
NOTES: The LED will burn out after a week or so. Since there is no resistor to ration the amount of power going from the battery to the light.


Comments
Post a Comment