We have been getting a few questions lately about the reservation/resource calendars. Here is a review, courtesy of a tech tip Paul sent out in September 2013. To view the printable version, click here. In this Tech Tip, we will instruct you on how to view and checkout Portage resources from your own calendar.
Note: Google Resource Calendars are for use during the school day. For scheduling resource use outside of school hours you must use SchoolDude.
Viewing Resource Calendars (Adding to your calendar)
Step 1:
While viewing your Google Calendar, on the left-side of the your screen under “My Calendars”, hover your mouse over “Other Calendars”. You will see a down arrow  , click that arrow and click on “Browse Interesting Calendars”.
, click that arrow and click on “Browse Interesting Calendars”.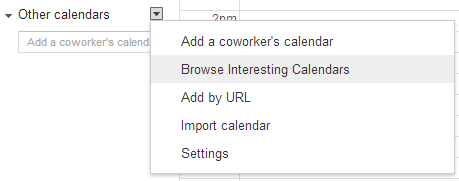
Step 2:
One the next screen, choose “More”. Then choose “Resources for portageps.org”.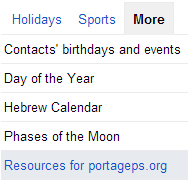
Step 3:
Select the building whose resources you wish to use. Then choose the resource whose calendar you would like to add to your calendar. (I have subscribed to AMB-Computer Lab.)
Outcome:
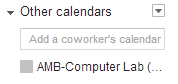
Your selected calendar now appears under “Other calendars”. You may now turn on and off your view of this calendar by clicking on its name. (In this example, I would click on AMB-Computer Lab.)
Note: A solid box  before a calendar means you can view the events on that calendar. A gray outlined box
  indicates that you have turned off that calendar from view.
before a calendar means you can view the events on that calendar. A gray outlined box indicates that you have turned off that calendar from view.
To remove this calendar from this list, you would click on the down arrow  next to its name and select “Hide this calendar from the list”.
next to its name and select “Hide this calendar from the list”.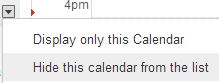
To unsubscribe from a calendar, you must visit “Calendar Settings” and click unsubscribe.


Checking Out Resources from Your Calendar (Creating an Event)
Step 1:
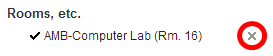
When you create an event on your calendar, you add the resource you're interested in via the "Rooms, etc." pane. For this example, AMB-Computer Lab has been selected. Click “Add”.
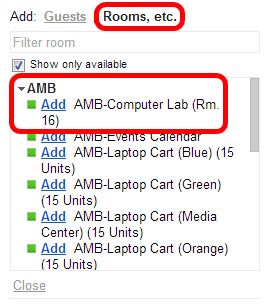
You will see that “AMB-Computer Lab” has been added to the “Where” field in your event.

You will also see that “AMB-Computer Lab” has been added as a “Guest” to your event.

Step 2:
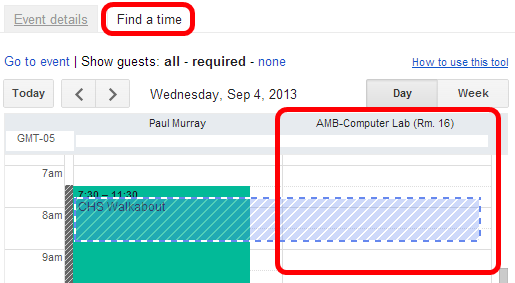
Check for available times. If you do not have this calendar added to your own, another way to check for times when a resource is available is by clicking on the “Find a time” tab.
Step 3:
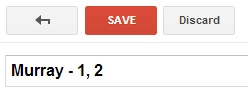
Properly name your event. Make sure to name your event with a description that is common for the building expectations or one that is detailed enough to allow someone to understand the importance of your event.
This might be something as simple as your name and the period in which you wish to use the resource. An example might be “Murray - 1, 2”. This title could signify that Mr. Murray requires this resource for 1st and 2nd period.
Or perhaps a detailed description may be necessary such as below.

Outcome:
Your event will now be seen on the resource calendar of your choice. Calendars may be moderated differently at each building so that events and event conflicts can be approved and resolved in a timely manner.
This example event has been created and is listed on the AMB-Computer Lab Resource Calendar.
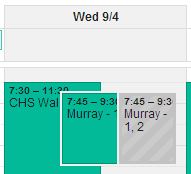
Notice that the event appears on both my calendar (green) and the AMB-Computer Lab calendar (gray). To edit the event, click on the event in your calendar. When you make changes to your event the resource calendar will update the invite accordingly.
If you would like to remove the resource from your event simply click on the “X” next to that resource.